Sunday, January 17, 2016

Office in progress

The office


 For the next couple of weeks I will be working on my office space and creating a corner for maximal productivity. The desk/office space is being shared with my husband, so trying to make it work of the both of us. I purchased this desk from Ikea with every intention of painting it. Once it was assembled I realized it would be a big project, due to all the lines, spaces, shelves. I was a bit discouraged about doing it. My original color scheme of my living room was navy blue and pink with filler colors, gold, white and black. Unfortunately, the navy blue sofa's were way out of our budget and during our browsing trip to Ikea, we pickup our whole living room, it's like that at Ikea. With that, my color scheme changed. It was now, grey and yellow, navy blue and orange. So to decide what color to paint the desk was hard, I wanted a pink desk. Instead I painted the desk a bright shade of orange. I will change the orange in the living room to pink later in the year and will post an update.
 

After de-cluttering the desk area, sorry no before pictures. Still have work to do.
 
It took under an hour to paint.

 
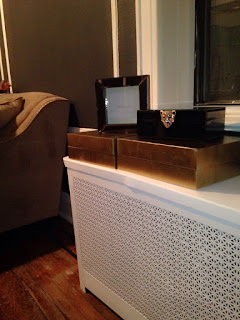
 I feel much better about the desk. But again, have a few thing to add, change and update, before I can take a breath of relief. I used a sample of paint in emergency zone by Behr, it's a fire-y orange. I also painted the sides of the desk, in gold using Martha Stewart's gold paint. This is a good example of what gold paint looks like with a few coats. It needs to be dried a day and repainted to cover the spacing. I also did not prime the desk. I did that on purpose because I will re-paint it pink later. I can not wait to tackle
that, I am so excited thinking about the pink desk. Stay tuned on for that update.
 
Supplies:
Sample paint
Paint brush
 
That's all there is to that.
 
Until the next project,
Jewelz!


Saturday, January 16, 2016

DIY: curtain tiebacks.

Hello Lovers, here is a quick tutorial/review of my DIY curtain tie backs.
To make my one bedroom apartment work for a family of four, I divided the room using the Ikea Dignitet curtain wire and the Lill curtains. This creates a dreamy look in the room and gives my husband and I some privacy. Sometimes the curtains can get in the way and we end up twisting the curtains and put it in the babies crib. I was inspired to create these curtain tie backs with some of the supplies I had from my jewelry making days. So it cost me nothing to create these tiebacks using what I already had. I am unable to give you a break down of what it cost, as the supplies were purchased wholesale.

 
I used some trim I had left over from my dinning chair project, which I will post, and hot glued some rhinestone flat backs on it. I sewed the embellished pearls to the trim. It was a bit time consuming due to the sewing part to ensure, the pearls did not fall as they are large and have weight to them.
 
Supplies:
Hot glue
Glue sticks
Flat back Rhinestones
Embellished pearl
Trim
Scissors to cut to size
 
Please note, due to the weight of pearls, I will add another piece of fabric to the back to hold it together. For now it works just fine.


I think they are absolutely beautiful and plan to make some more in different variations. I plan to sell them on my etsy shop. Will provide info on that later on.
On the other side is our bed.


I love and respect Ikea for what it has done for my family. I just hope their not evil people and then
I would have to take that back.
 
That's all there was to that.
 
Please comment below!
Until the next project,
 
Jewelz!


Don't you love a good table setting?!
To put a good setting together it takes time, and if you have a theme in mind, patience. Here is a quick, Where did you get those? post.
Chairs: Originally Raymore and Flannigan. I have upholstered them. Will post about it.
Feathered placemat: Zgallerie, sold out. But they usually have a different variation, every season. Also these would be easy to make. ( I plan on doing that this year and will post)
Jeweled tray, gold taper candles and rhinestone napkin ring holder: Zgallerie
Gold Charger and candle holder: Amazing Savings
Rhinestone Charger, faux floral in faux water, rhinestone tea candle holder: Home goods
Napkins: Frette Home (Sample Sale)
Table Runner: Joss and Main
Dining table: Ikea
Ghost chairs (not easily seen here): Ikea
I am working on adding pink to this setting. Made these Pink and white taper candles with duck tape, but was not feeling it.  So I added the gold metallic ones instead and love. Stay tuned on the updates of this table.


That's all there is to that.
Please comment below some of the places you get your fab finds.
 
Until the next project,
Jewelz!


How to: DIY painted dresser

Hello lovers, how I went from bland to glam.

 
I purchased this dresser when my first child was born. When I was pregnant with my second, I recycled the dresser and wanted to give it a fresh new look. As I was working on the girls side of the bedroom, I wanted to incorporate more pink. I was adamant about sticking to the color scheme. The walls were painted, Mocha Bisque by Glidden, which is the best brown color for light pink. Next time thought, I will get a color match at Behr, as their paint, is thicker.  This is important, as paint can get costly if you have to paint many coats
 
The girls side
 

The finished look.

This a very easy project and cost effective. I purchased the knobs from Home goods. Luckily for me there was two boxes, because each box contained six and I needed more than that. I primed this dresser because I wasn't sure how the paint would stick. This dresser would get a lot of wear and tear. After I primed I began to paint, the primer dries fairly fast. Some people will wait a day to paint after they prime. I usually don't have a day, I have right now. Once the paint dried I applied thin layers of wax coat by Americana Décor. This way the dresser would be easy to clean.
I try not to throw away furniture, you never know when you will be able to use it again. With the magic of paint, you have a new piece of furniture. With limited space, I know  how that can be difficult. I challenge you the next time you want to throw something away, to use your creative juices to find the potential of the item. I am happy when I recycle my furniture because I can create the look I want without paying an arm and a leg for it.
Supplies:
Cynthia Rowley door knob: $8 for a set of 6
Paint: East lake Rose by Behr in eggshell finish. ( I already had a gallon on hand)
Americana Décor in crème wax: 8oz jar $12
Brush
That's all there is to that.
Please leave a comment below and share with your family and friends.
Until the next project,
Jewelz!

DIY black and white striped walls.

 
Hello Lovers, here is my tutorial on my, DIY black and white striped wall. I am completely mad about black and white. My love affair began during my first trip to Sephora, I was fresh out of college and was discovering make-up and all things beauty. I was enamored with the décor and their shopping bags. Since then, black and white has always been a staple with mostly everything. It is just, simple gorgeously chic. In the four apartments I have lived in, outside of my parents home, three have had striped walls. In two of those apartments, I have painted been black and white stripes. The other stripes were sage green and Chinese jade. Although, I am not an expert, I have some experience with stripes. The more I do them the easier they become, as I learn new techniques.  I prefer the vertical lines just because it's easier. I will work on horizontal lines one of these projects. Please note, it took me about 1hr and 45 minutes to complete from start to finish. The wall I used is in my entryway and I wanted to add the Jewel effect to it and to compliment my zebra print bench. The wall measures 4x6, and I painted 7 black stripes. The white on the wall is decorators white, which was painted before I moved in.

This is a panel painted from a previous apartment.
Wall taped and painted.

After tape was removed.
 
Full length mirror from Ikea.
 
My painted end table, I love hot pick paired with black and white.
 
 
List of supplies:
Blue painter's tape
Small rolling brush ( smooth finish)
Small paint brush ( for hard to reach areas and corners)
Paint tray
pencil
Jet black paint from Benjamin Moore in eggshell
Newspaper to protect the floor (optional, as I did not use any)
 
I measured the stripes to be 5" wide, as I did not want them to be too skinny or two wide for my wall. After measuring the 5', I taped the wall all the way down to the boarder. For the white area, I began the tape where the black stripe should end and as you can see in first picture I put a piece of tape on the area that was going to be white so that I didn't make the mistake of painting it black. Then I began the next stripe within the white area to ensure each stripe was 5" wide. Ideally you would want to use a measuring tape, however, I measured the first stripes width, with the painters tape and used that size as a  sample for all the other stripes. I applied three coats of paint and allowed the paint to dry about 30 minutes before I removed the paint. Don't do that, allow the paint to dry a few hours before doing taking off the tape. When I removed the tape, although, the wall was pretty dry, the edges where not straight. Please considering painting the edges of  the tape the original color of the wall, in my case, decorators white, to ensure the black does not bleed. I was too hyped too wait and pick up a sample of the paint to avoid the uneven edges. It is bothersome to me when I look up close, I do not notice it through the picture so I am not going to loose sleep over it. That is all that there was too creating this look. I was very pleased with the outcome and for my new photo opt wall.
 
Christmas day photo opt.
 
The end table pictured above, was also painted. I had originally painted this about a year ago and it needed  a touch up. The pink paint used is beauty queen ( my favorite hot pink) by Behr and Gold leaf paint was used for the gold

Black and white and gold is so glam!
 
Well that's all there is to that!
Please leave your comments below.
Thanks for reading, until the next project,
Jewelz!

Holiday hot chocolate bar/cookie decorating party, 2015.

 
For this past Christmas, 2015, I planned my first cookie decorating party with a hot chocolate bar. I was really excited about putting this together, I may have it annually.
Etsy is a great place to start searching for those special details for any party. If you though it, someone made it. Keep in mind when you are planning an event, to purchase from Etsy a month in advance, due to each shops various shipping policies. I purchased the hot cup labels from an Etsy shop.
 
The lables gave my event that special touch. Your guest might be reluctant to throw it away and re-use or keep it as a souvenir instead. At least your spending isn't all a waste.
 
I used Orientaltrading.com for rest of the items, I did not have on hand. Gave the guests cookies in the take home gift bags. I also purchased the gingerbread desert paper plates, red and white paper straws, printed hot cups and the mini candy canes from oriental trading. I wrapped the kids boxed juices with holiday wrapping paper, which I already had on hand. Used this idea for my daughter's 4th Frozen themed party, earlier in the year. Wrapping isn't only for wrapping gifts anymore. I also had chocolate chips and marshmallows for the hot cocoa.
 
For the cookie decorating station I used the muffin tray to separate the cookie toppings. I made pipping bags for various colored icing.
 
Because of space and time, I pre-baked the cookies and had them ready for my guests.
 
I purchased the cookie cutters from, cookie kingdom. The cutters were pretty good, they are sharp and create a good impression in the dough. We had, stockings, presents, Christmas trees, wreaths, snowflakes, and holiday a hat. I baked simple sugar cookies by Betty Crocker, added organic vanilla extract to the mix. If I wasn't careful, would have eaten all the cookies, they are that good.
There goes my 4 year old, enjoying her art.
 
The event went well and we all had a great time. The holidays is more than just presents, but about creating memories and spending your time with family and friends.

 
That's all there was to that.
 Please comment below with ideas from your holiday party.
 
Until the next project,
Jewelz!


The gold rush!

Hello lovers, I usually have a few cans of gold spray paint and gold leaf on hand. I always have projects I'm working on and they usually include gold. I find that if I have supplies on hand I am more likely to DIY. I rather that than to pay more money buying it somewhere else and not be completely satisfied. 
 
Here is an ordinary laundry basket, on it's way to the trash. Someone else's trash was my treasure.

Layed plastic on the floor and sprayed everything I could get my hands on.When spraying indoors, just note, the dust will be everywhere. I use enough plastic to cover the entire area where I am spraying. Depending on the surface, spraying is not always easy, as the liquid can run. I did not prime the laundry basket and after some wear and tear, it chipped and peeled. If you plan on spraying a plastic laundry basket, prime it first. It will last longer. I don't have a preference when it
comes to the brand, but I usually use, Rustoleum spray paint.

I purchased these picture shelves from Ikea, next time I will purchase them in white.

The results are true liquid gold.


 For these items, I used gold leaf, which also provides a true gold. When I use the gold leaf, I use a sponge brush. Absorbs the paint and glides smoothly. In using gold leaf, you will apply a few coats, to ensure the finish is even. One 2oz jar, goes a long way.  
 

Base of this dinning table was primed and painted using gold leaf and a sponge brush.

The pink used on top of the side table, is beauty queen.

 
Spraying and painting is a great way to keep old furniture new.
That's all there is to that!
 
Until the next project,
 
Jewelz!


The dark side is not for everyone!

 
Hello lovers, here is a living I was working on with my sister, early last year.
 
 
I really enjoy working with new colors and coming up with creative ways to use it and make it functional. My sister had a really hard time with such a dark living room, she has since changed it. I just love it and wanted to showcase it anyway.


Love panels, because there is so much that can be done with them. Sometimes you just have to go with what the client wants. Just wish I could have had my way.

 
Of course, I added striped walls. Love the character the arch gives the entry way.

 
It was a lot of work to tape all the panels and borders but, the end results are worth it. 
 
Walls were painted and allowed to dry a day. Then the panels were taped to add
the gold. Gold paint is by Modern Masters, Best gold paint so far, not thin like, gold leaf. Also not cheap like it either, but still worth it. The paint used in the living is charcoal by Behr in semi gloss.
She has re-painted her living room French mocha, which is on the other end of the spectrum. Choosing paint can be tricky, so sample, sample, sample!

Until the next project,
Jewelz!